Lines of Code
After the Log4Shell debacle in December (no, I don't want to provide a zillion links) some security aspect comes up in discussions again: Lines of Code, ie. the attack surface of services.

In the USENIX Security Symposium 2020 "Laser-Based Audio Injection on Voice-Controllable Systems" was presented: making MEMS-microphones believe that audio input happens via amplitude-modulated light from far away. We reproduced these efforts, to show that such threats are legit and shouldn't be underestimated.
In the LightCommands paper a Google Home was used: these have their microphones oriented directly to the outside, so lighting the right place directly affects the MEMS.
In our setup it wasn't quite as easy - look at this sketch of a conventional smartphone:
The sound waves come in on the right side, get reflected in the sound channel, and move the MEMS membrane. Laser, being much more directional, isn't as flexible; this means that we can't get enough power reflected "around the [sound channel] corner" onto the MEMS microphone.
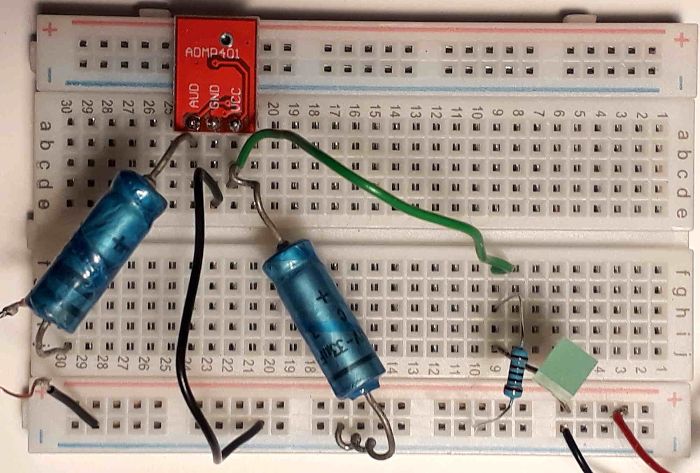
A "Tool-Time"-esque solution wasn't feasible - we couldn't provide safety goggles for all participants and had to settle with a low-power laser diode (an ADL-65075TL: red, 7mW). As a workaround a separate receiver circuit was set up: an external ADMP-401 (mounted backwards, so that its sound input was wide open to the outside - see below), connected as microphone input to the (3.5mm) headset jack of our target.
The required 1.8-3.3V supply voltage was obtained from the smartphone's USB port via a resistor/LED setup; here's the breadboard.

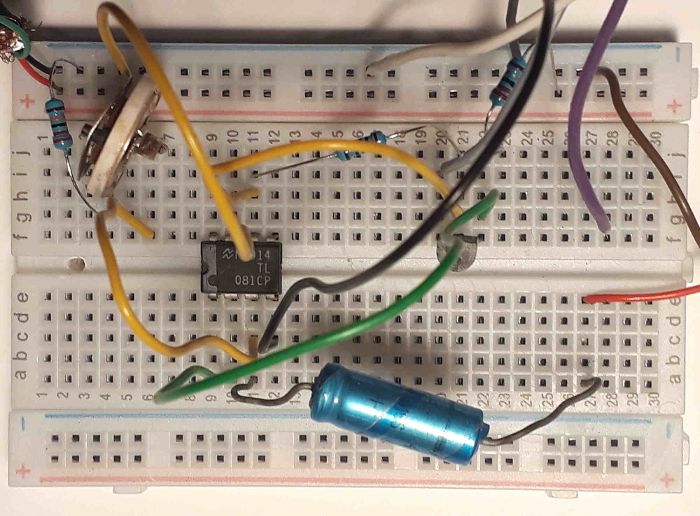
The sender was a bit more involved.
A nice little OpAmp (TL081CP) was used to set up the working point (bias current) right in the center of the Laser's current range, to minimize distortions. To calibrate: get "Signal Generator" from F-Droid, set it to half a Hz, and adjust the trimmer pot and the volume until the laser point fluctuates nicely without running into obvious limitations. Or use an oscilloscope, if you have one, of course.
With a typical headphone output amplitude of ±200mV and the 22Ω resistor in the emitter path of the PNP transistor we can achieve a current range of about ±9mA - that's good enough for this small-signal Laser-ED. If we'd need more amplification, the OpAmp would already be available, anyway - or we could just use a smaller resistor, then the current range would be larger as well.
The breadboard receives 5V supply voltage (from a standard USB charger) on the upper left; the two wires on the right (brown and red) are the input, connected to a 3.5mm jack.

So far for the electronics.
For the presentation I covered the MEMS with a glas jug, so that ambient sounds (like me talking) wouldn't directly influence the victim smartphone. To show the audience that the optical signals get correctly interpreted as audio commands, I mirrored the smartphone display to an electronic whiteboard (because that worked out of the box), and dictated and sent an SMS.
The actual demo worked, more or less - due to some background noise (alternating hotspots between 70 and 110 Hz, I guess the AC during a hot day) not all speech sounds were recognized equally well. At some time I pondered fetching a Helium-filled balloon from the other room to switch my frequency bands, but then a co-workers' child came to the rescue and had a more intelligible tone range on some words ;)
The attack, as written down in the paper, is for real. Whether a multi-Watt laser can be aimed good enough at the microphone sound hole of some device without melting it (or the surroundings) down is a different question; at least some devices (especially the Smart Home products!) seem to have their microphones located conveniently on the outside, so that controlling them via light may be a valid concern.